
So You Want to Improve Your Podcast?
When I started my podcast back in 2005, I had absolutely no idea what I was doing; some (myself included!) would argue that I still have no idea what I am doing. I have no audio engineering training, I continue to use incredibly basic software, and I only have a rough idea of why some of the equipment I use is “good” in the first place.
That being said, I’m fairly confident that when someone loads up a recent Kanzenshuu podcast episode, they are going to: (1) have a good time, and (2) for the most part, not want to rip their ears off from poor audio quality.
I was slow to “get” “into” podcasts. I didn’t quite understand their purpose in 2005 as radio continued its slow death. I wanted to do something very different for the website, though, and it seemed like as good a time as any to get in on what still felt like the ground floor of a new movement.
These days I still listen to a wealth of podcasts. Some are old stalwarts, some are mainstream corporate shows, some are plucky amateur upstarts, and others come and go. Whereas in 2005 I found myself very forgiving about audio quality so long as the underlying content was there, these days I consider my time a little more valuable: I need both engaging content and “good” audio quality… not necessarily perfect, but something where clear effort and care went into it.
These are a few of the most important tips, tricks, and techniques I have taught myself over the years. Again, I preface this by saying I still have absolutely no idea what I am doing. I have been faking it since 2005. If you are an audio professional and you want to “correct” some of the awful habits I have lodged in my brain, by all means let me know.
For the most part, this should take you — the aforementioned plucky amateur podcaster — to heights you didn’t think were possible. People may not be able to articulate it when they hear solid production, but they certainly recognize it far back in their reptile brain. They’re thanking you for your time and effort!
Your Recording Space
Don’t record in a gigantic airplane hanger. OK, that’s probably not your scenario, so at least maybe don’t record in your kitchen. Turn your air conditioning and fans off. Send your roommates and significant others away if they are not recording on the show.
Microphone Etiquette
Figure out the exact position where the best sound comes through your microphone. Stop moving and shaking around. Stop typing on your keyboard. Stop nervously clicking the mouse. Stop smacking things on the table. Speaking of tables and desks: your microphone shouldn’t just be sitting on them. Get yourself some kind of stand or holder. Use a pop-filter to cut down on those plosives. Once you’ve figure out a good position, don’t wander away from your microphone. It’s tempting to sit back and relax in your chair, or look to the side and keep talking. Don’t do it!
Also hey uhh good lord please stop eating while recording a podcast.
RECOMMENDED:
Samsom BT4 Telescoping Boom Stand
NEEWER Adjustable Microphone Suspension Boom Scissor Arm Stand
CAD Audio EPF-15A Pop Filter
Initial Test Recordings
After you’ve done all the above, start doing some test recordings of yourself. Is there a low hum going on somewhere? Figure out where and make it stop. Do you hear your pipes clanking in the background? Time to choose a different room. Is there a clock ticking on the wall that’s getting picked up? Move it elsewhere.
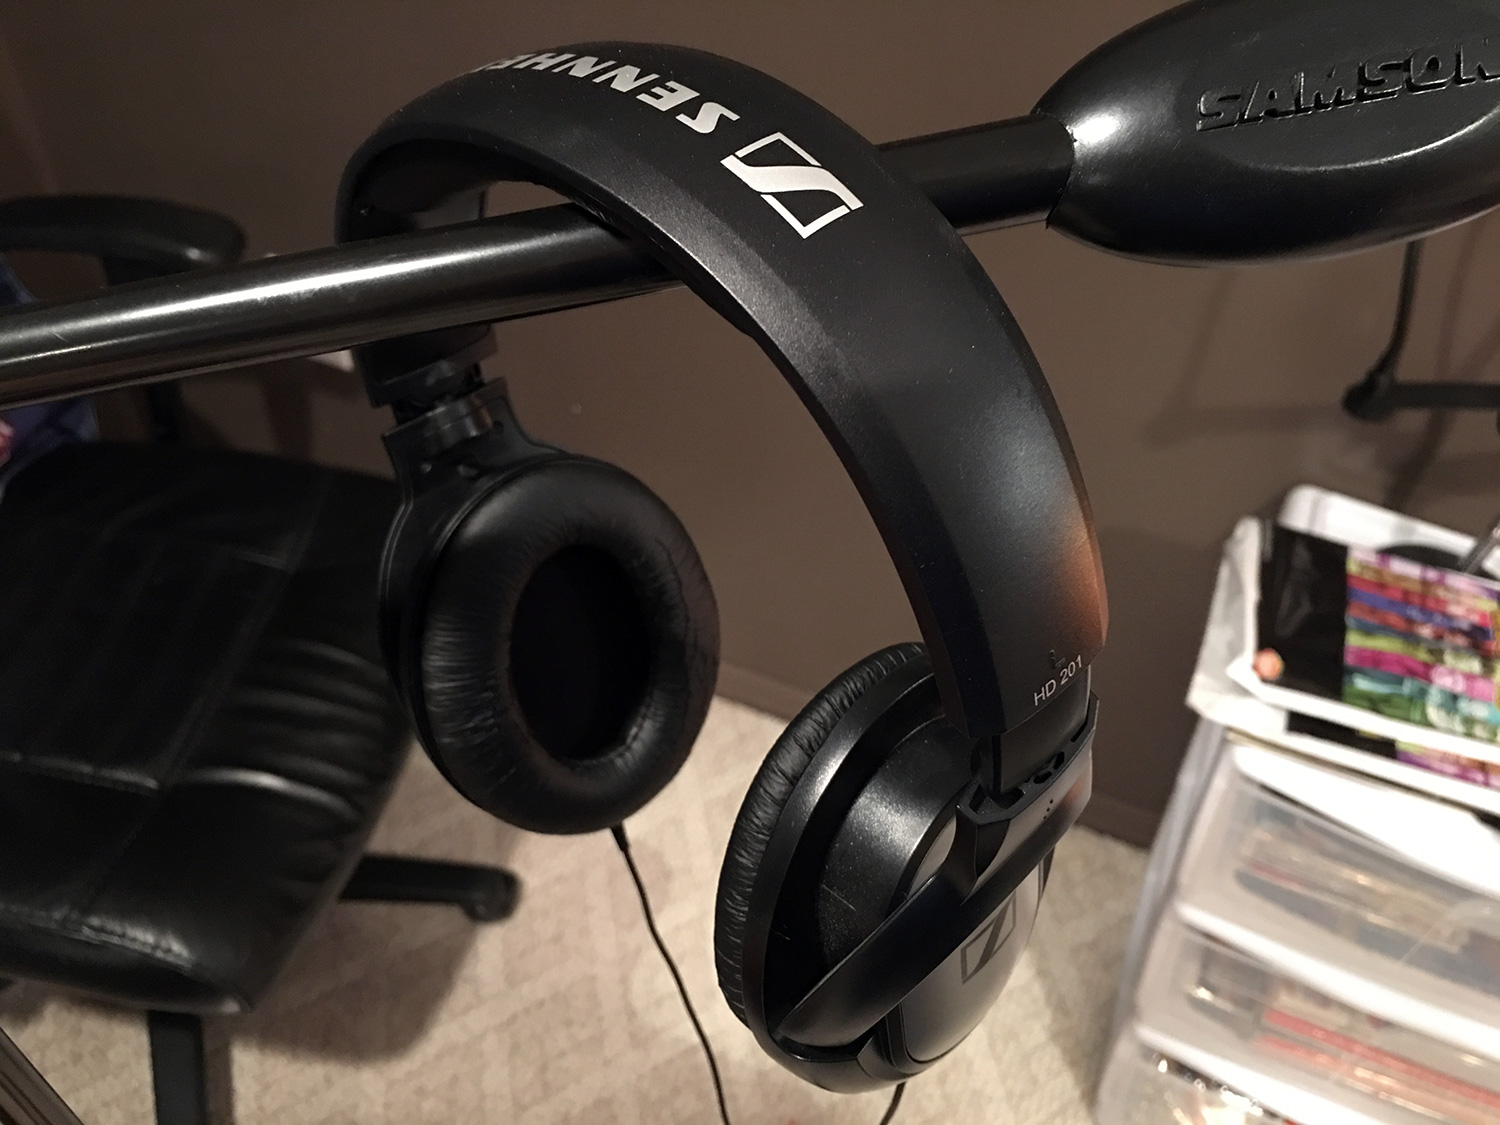
Headphones
You should never be podcasting with audio coming over speakers. At best, you’re going to get random operating system sounds when Windows invariably decides it absolutely has to let you know right this second that a new update is available. At worst, you’ll be recording with someone remotely and you will get their audio picked up on your audio track resulting in an awful echo. This is easily avoidable: put headphones on. We’re not talking stock Apple earbuds here; you need to wear actual, over-the-ear headphones. You don’t necessarily need anything crazy (we’re not doing heavy metal studio session monitoring), but you do want headphones that won’t leak out too much audio. A long cord might also be a plus so you can set things up comfortably. Go with traditional analog headphones (not USB) for more versatility and no chance of audio driver issues or conflicts. Turn your audio volume so you can hear your podcast co-hosts and participants, but not so loud that your microphone is going to pick up audio leaking out the sides.
RECOMMENDED:
Audio-Technica ATH-M20x
Sennheiser HD 201
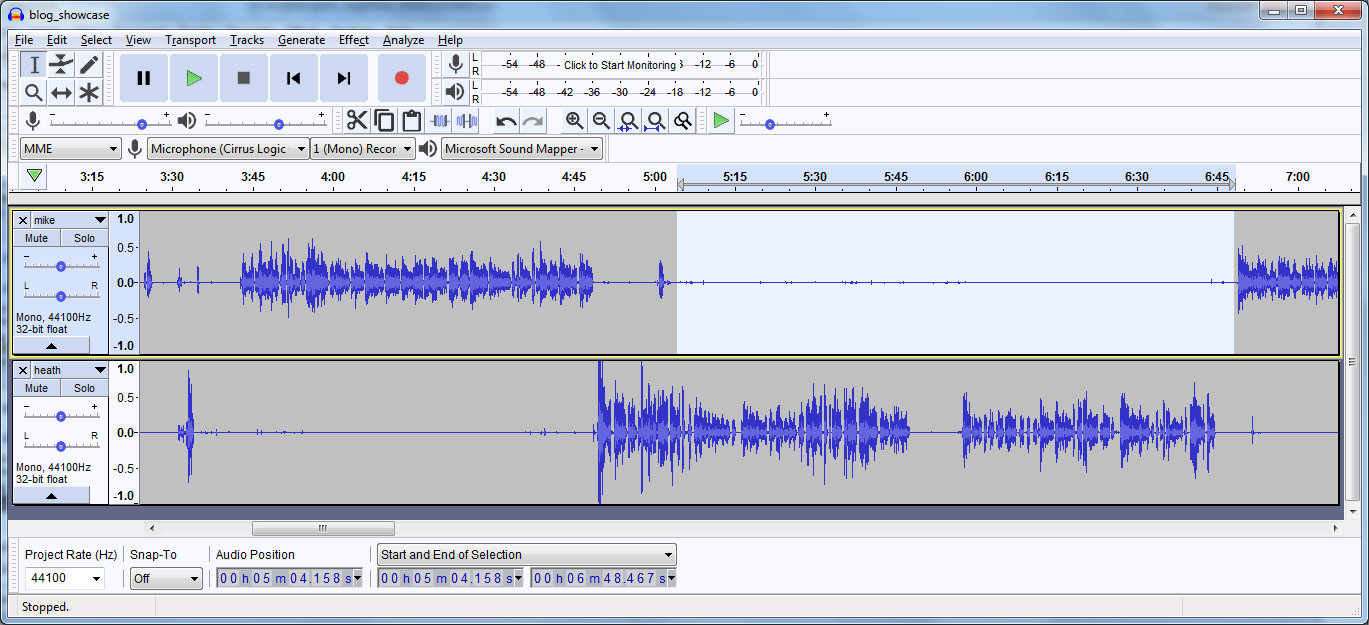
Multiple (Remote) Hosts Means Multiple Audio Tracks
Ideally, all of your co-hosts are in the same room. There’s something to be said for that real-time feedback and ability to play off each other. This isn’t always realistic, though. I get it.
If you are going to get serious about this, each individual host (co-host, guest, etc.) should be recording just their own audio track by themselves on their own computer. Skype conversations sound like Skype conversations (and/or Discord, TeamSpeak, etc. conversations). There’s audio quality degradation, there’s that extra moment of silence between speaking, etc. It sounds amateur-hour because it’s really super amateur-hour. The biggest step up you can make is having everyone record their own audio track. This is going to be a little more work for the editor in the long run, but if you’ve already decided to get serious about this, well, this is what you’ve signed up for.

Realistically, not every special guest you have will be able to do this. We can’t expect every expert in the field to also have audio recording setups the same way we do. However, if you have the same couple people on your podcast every episode, they’re in this deep enough to respect the craft and your time to step up their game and help out.
Record Your Own Backup
That all being said: always record a backup. Things go wrong. They always do. Someone’s computer is going to crash. Someone’s export is going to corrupt. Someone is going to forget to send you their audio and go on vacation for two weeks in the middle of the ocean.
In lieu of re-recording the entire show (which is also an option!), if you record your own backup you at least have something to fall back on. Ideally your backup should also be multi-track as if you were still all recording locally. At the very least, you want your own audio track in one channel/track and the “call” (whether it’s one other person or multiple other people) in another channel/track.
When you’re just getting started with editing multiple audio tracks, this backup can also be a good temporary tool to line up everyone’s recordings where they’re supposed to be. You’ll eventually get used to the flow of things and will be able to line things up naturally all on your own.
RECOMMENDED:
Ecamm’s Call Recorder (Skype, OS X)
Craig (Discord)
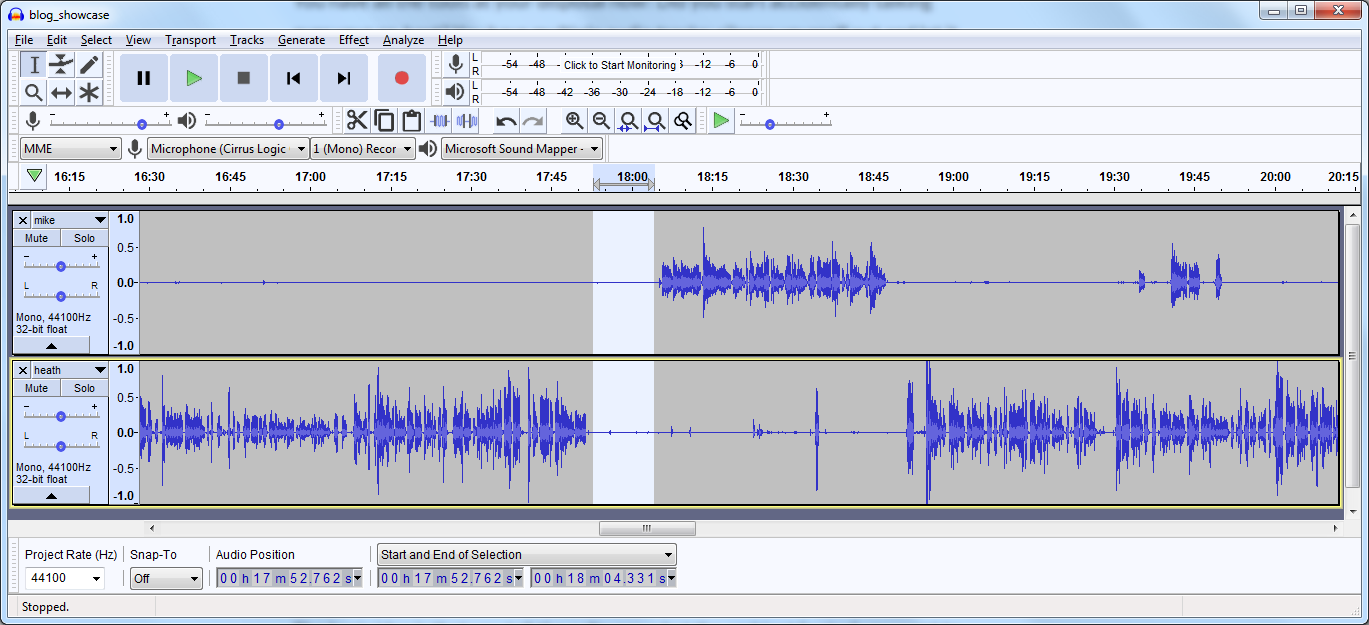
Selectively Silence the Other Audio Tracks
If you’re reading this, you are (like me) not an audio engineer. We can set our recording spaces up to the best of our ability, but we are still not radio professionals. We need to overcompensate a little bit.
This is the next step and reason why you were just recording multiple audio tracks. Go through and start silencing out what should be total silence in the other tracks. You don’t think you’re making noise, but you are. Again, we’re not professionals: we’re all breathing in the mic too hard, we’re all knocking into things at some point, our phones start buzzing, the cat starts meowing, the neighbor starts chainsawing trees… the list goes on and on. Look at your waveform: you’ll see little dots and hiccups, which you can and should just kill off.
There might be plugins and automatic procedures that look for frequencies to silence out, but I prefer doing it manually. It takes more time, but I get finer control over what I want to silence out. Consider setting some hotkeys if they aren’t already available in your software. I like to set “Z” as “Cut” (for the ring finger) and “C” as “Silence” (for the pointer finger) in Audacity.
Edit Your Damn Podcast
You have all the tools at your disposal now! Did you start accidentally talking over your co-host? You have multiple audio tracks; silence yourself out and let it play out as if you never did. Did you start a sentence over because you randomly hit puberty and your voice cracked? Cut it. Is there a long, awkward silence before someone answers a question? Cut it down to something natural.
It can be tempting to OVER-edit; resist this. Don’t be the equivalent of that dude on YouTube who’s doing jump-cuts within the same sentence. You want to edit it, but you want it to still flow like a natural conversation.
Do you have musical bumpers? Listen to a “real” radio show or watch a “real” television show. You’ll notice the music fades down right at the very second someone starts talking. Yeah. Do this. We can’t hear what you’re saying when you start talking over music that’s still playing at full volume!
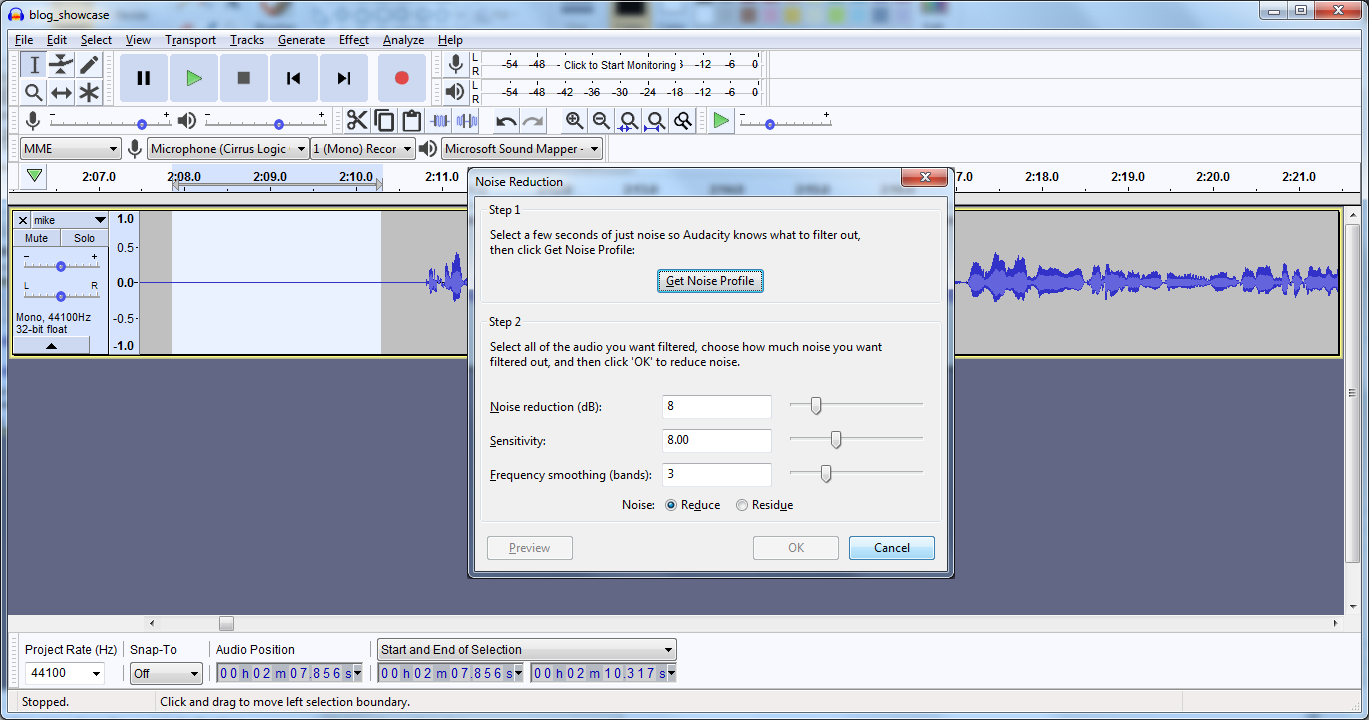
Noise Removal
Experiment with noise removal and leveling. Even Audacity has some pretty powerful noise removal tools built in to it; if you have done everything above, you are bringing in some halfway decent audio, which means the noise removal is going to be easier than if you have your fan blasting at you from two feet away.
The basic idea is that you tell the software what the ambient “noise” you want to remove sounds like, and then have it remove that from the entire recording. Select a portion of a couple seconds where you’re not talking, there’s no audio echo, you’re not breathing all over the mic, etc. Basically, what does “nothing” sound like in the room? Let’s get rid of that! Do this individually for each audio track; your “nothing” will be different from someone else’s “nothing”. I like to set aside 10 seconds or so at the very beginning of a podcast recording for everyone to shut their yappers to sample as this “nothing”.
The default removal settings in Audacity tend to work well for me after sampling my “nothing” to remove. You may need to go higher depending on your setup. Test, undo, test again, and keep testing until you find a nice balance of audio quality versus that weird, echo-y artifacting caused by removing noise at the higher levels.
For what it’s worth, I prefer doing the noise removal, then doing the aforementioned selective silencing.
Equal Volume Levels Among Participants
Since we’re not audio professionals, we don’t necessarily have all the equipment and studio monitoring crew to keep us at the same volume all the time. However, through the magic of software, we can fake it!
If you are recording with others over something like Skype, look for a setting that tries to adjust your volume automatically. Turn this off. You’re stepping up your game and acting like a super-awesome podcast host, right?! All this is going to do is blow out your audio when you come back in after someone else talks. While you’re at it, make sure your audio recording program and your call software are recording the correct microphone/input (that is to say, not your laptop’s internal microphone!).

Once I’ve done all my noise removal, silencing, and editing, I toss the “final” voice-only export into Levelator and let it do its magic. If someone is whispering the entire show it’s going to have to work harder and you will definitely have some artifacting, but if folks are in the same ballpark, this is your last step to take things from 99% to 100% awesome.
(This “Levelated” voice-only audio track is what I ultimately bring back into Audacity to edit in the intro, bumper, and closing music. The truly final/master audio is then exported from there.)
RECOMMENDED:
Levelator
The Car Test
Load your near-finished podcast up on your phone and go for a drive (or, if you don’t own a car, maybe take a little mass transit trip). Can you hear it well? Can you hear everyone well? If you ever have to adjust your volume even once more during the trip, you’re doing it wrong. It’s a podcast, not a classical music performance; you don’t need extreme dynamic range on the voices.
Umm… What About Equipment?
Yeah. That’s important, too. Sure. If you master everything above, however, you’ll be able to squeeze an impressive product out of an $80-$100 mic without going out of your mind spending money on things you don’t know how to use anyway.
What Else Should I Know?
A podcast isn’t a podcast unless it’s distributed the way podcasts are distributed; otherwise, it’s just a show you made. You can and should post your show on YouTube and SoundCloud… but you have to actually make that MP3 available via an RSS feed. You can upload and hand-code a feed, or use any variety of blog and podcast-posting services (maybe something like Libsyn). Get your show out there as a real podcast, and make sure you submit it to things like iTunes and Google Play. Hardcore podcast fans are using tools and apps like Overcast; your SoundCloud ain’t gonna cut it.
Congratulations! You are theoretically now a slightly-more-informed plucky amateur podcaster!
P.S.: You will eventually know what your own breathing and your co-host’s “Uhhh…” looks like as a waveform without having to listen to it.
Be the first to comment